Creating a Sales Order
Creating a new Sales Order
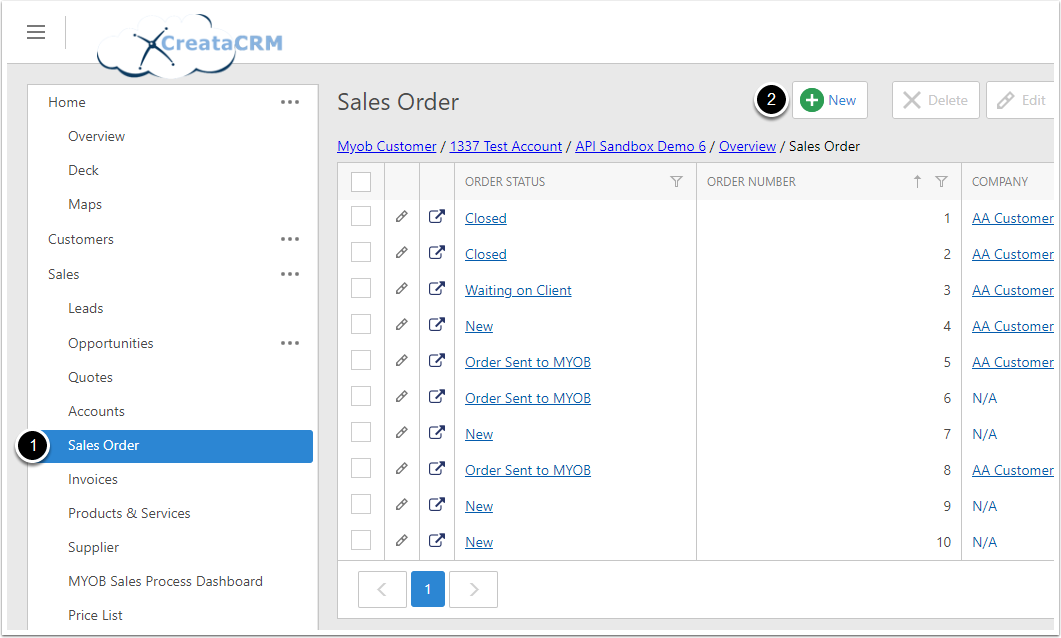
- Navigate to Sales > Sales Order
- Click New
Filling out the Sales Order
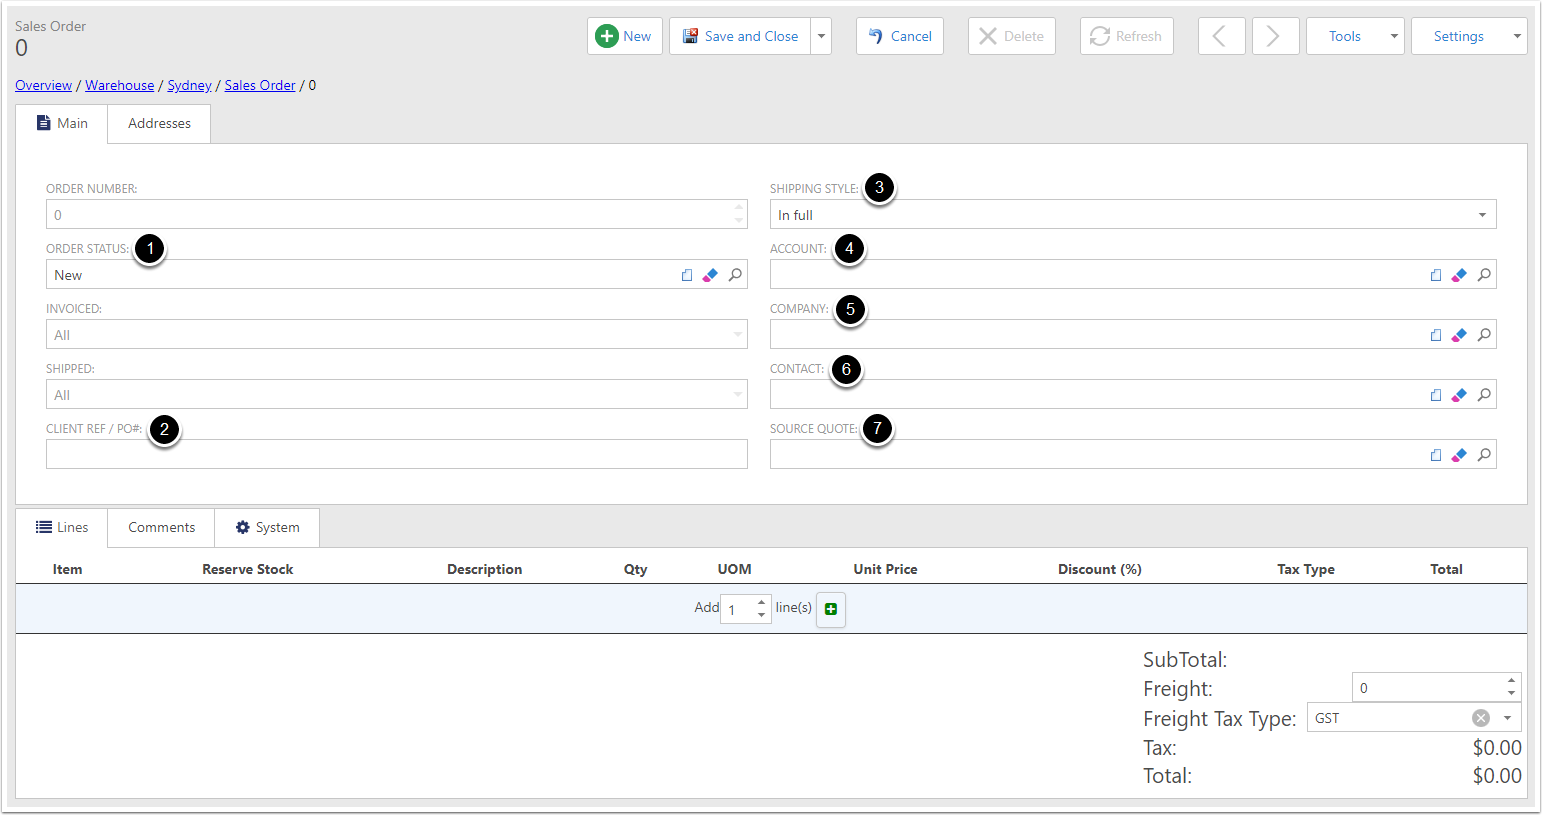
You will need to fill out your new order. The fields are as follows:
- Order Status - Indicates the status of the order; defaults to New.
- Client Ref / PO# - Enter the Client Reference/Purchase Order number here.
- Shipping Style - Either In Full or As Available. In Full indicates that the order should be shipped once all items are available; As Available indicates that the order lines should be shipped as soon as the stock is available.
- Account - The Account that will be used for Shipping and Invoicing
- Company - The Company responsible for the order.
- Contact - The Contact that made the order.
- Source Quote - The Quote that this Sales Order is fulfilling (automatically set when using the Quote to Sales Order Tool [See Converting Quotes to Sales Orders]).
Note: When you select a Contact or Company, the Account will be automatically set to that Contact/Companies Primary Account
Setting the Billing/Shipping Addresses
- To set the Billing and Shipping address for the Sales Order, open the Addresses tab. You can fill out the addresses manually, or alternatively use the Change Address tool
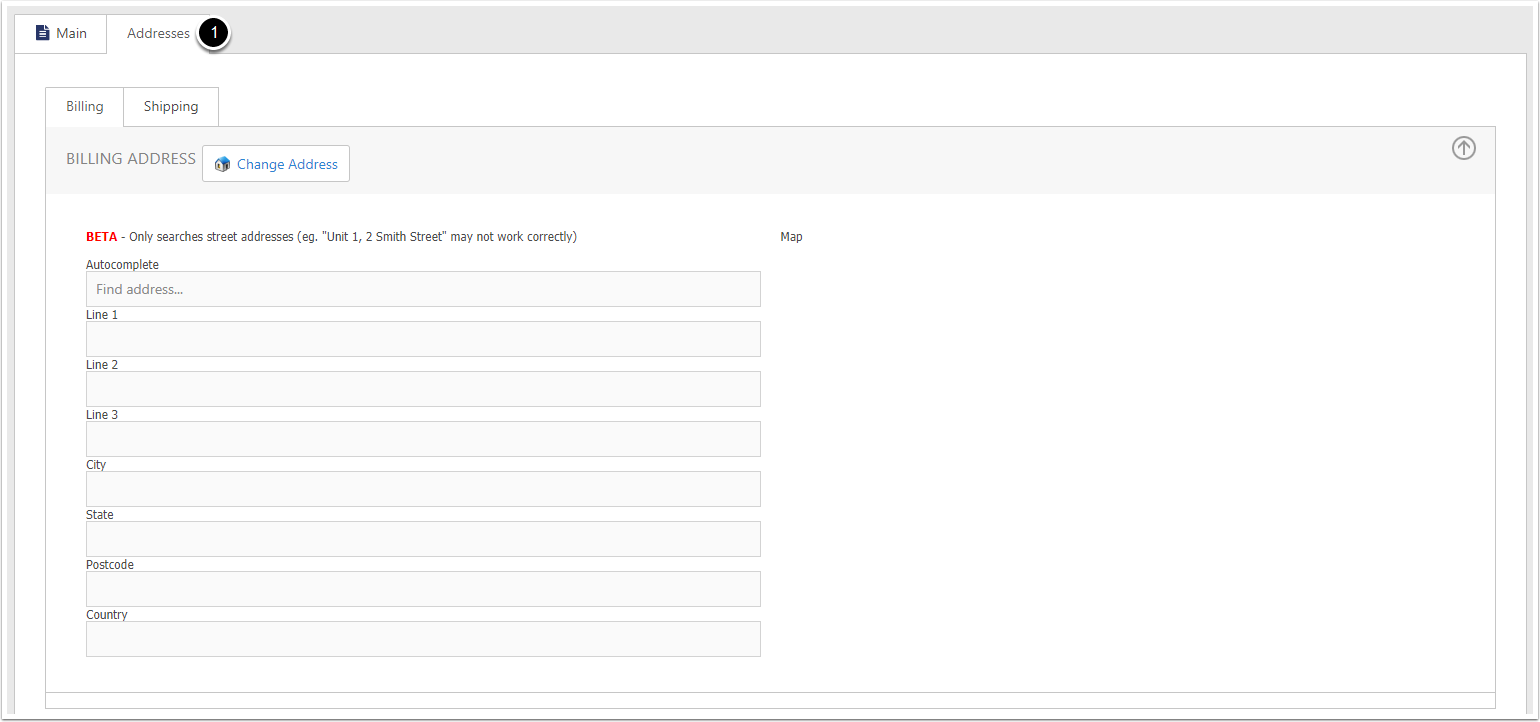
Using the Change Address Tool [1]
The Change Address tool lets you copy an address from the Orders Primary Contact or Primary Company. To use the tool, click Change Address

Using the Change Address Tool [2]
The Address Holder popup will appear.
The Address Holder displays any addresses related to the Orders Contact/Company. You can check where the address is from through the Source column.
Click on an address to copy that into the Billing/Shipping Address of your new Order.

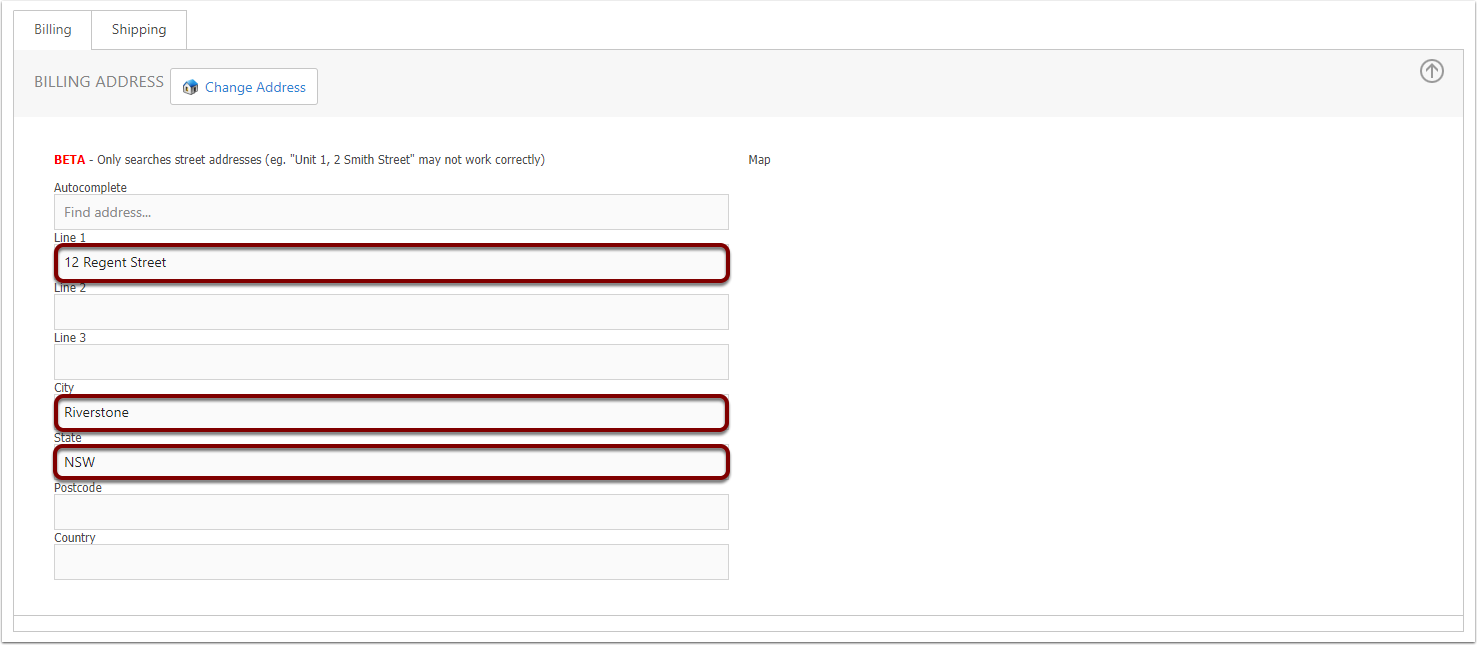
Using the Change Address Tool [3]
You will notice that the Billing/Shipping Address has been populated with the values from the address you chose.
Adding Order Lines [1]
- Go to the Lines tab.
- Select how many lines you would like to add, and press the + button.

Adding Order Lines [2]
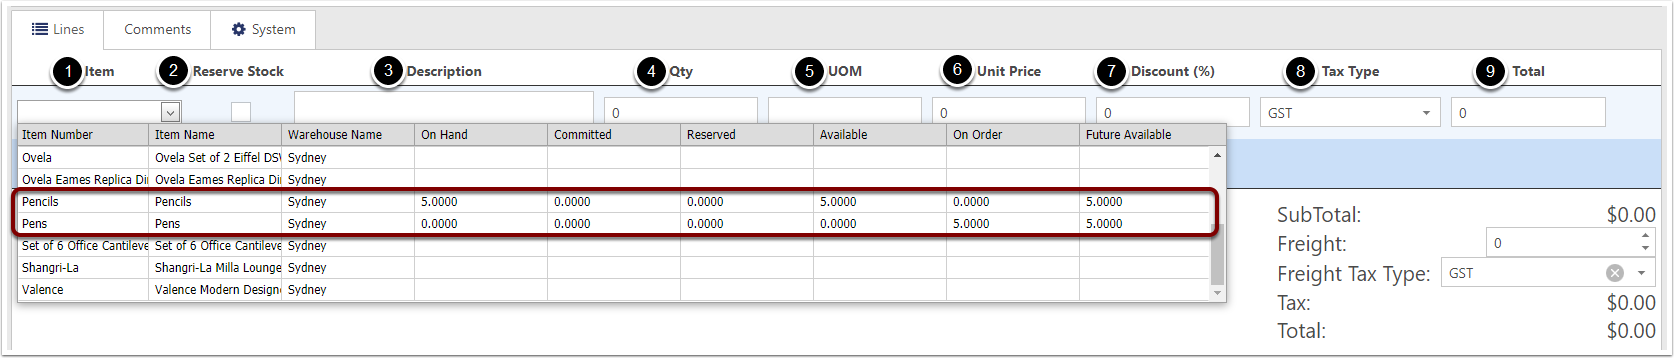
You will need to fill out the lines you have added. The columns are as follows:
- Item - Choose one of your warehouse products. Once you've chosen one, that products information will fill in the rest of the line.
- Reserve Stock - Tick this to reserve the required stock from the warehouse. Recommended when not immediately shipping the order.
- Description - A description of the product (This will be filled in when you select an Item).
- Quantity - The Quantity of the product that has been ordered.
- Unit of Measure - The Unit of Measure that is used by Quantity (This will be filled in when you select an Item).
- Unit Price - The price per Quantity of the product (This will be filled in when you select an Item).
- Discount - The % discount to be applied to the Unit Price.
- Tax Type - The tax type to be applied to the product (This will be filled in when you select an Item).
- Total - The calculated total of the line after taking Quantity, Unit Price, Discount and Tax Type into account.
Adding a Freight Charge
You can add a Freight Charge to the order. To do this:
- Fill in the Freight field.
- Select the Tax Type to be applied to the Freight Charge.

Saving the Sales Order [1]
To save your new Sales Order, click Save And View
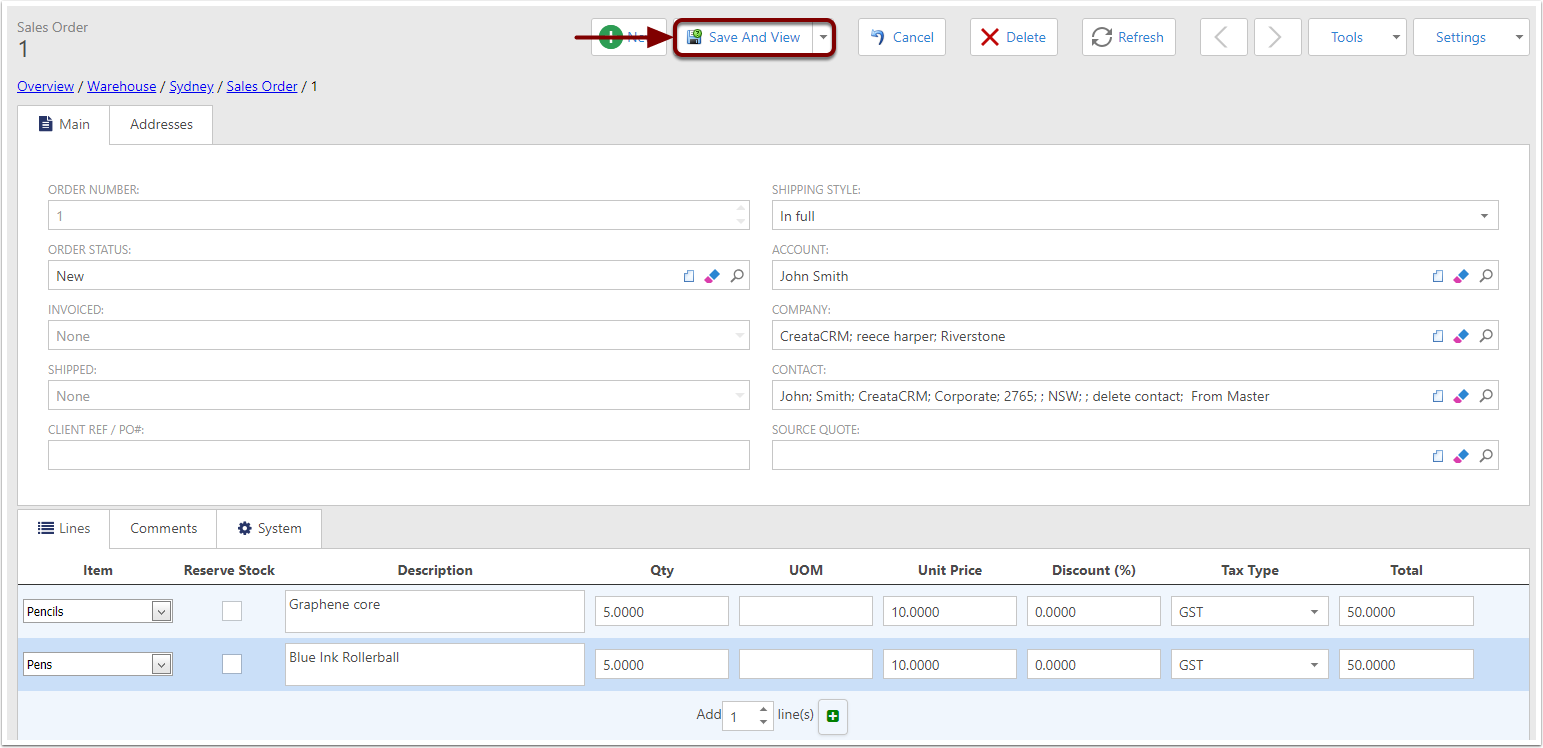
Saving the Sales Order [2]
Your new Sales Order has been saved, and is now ready for Shipments and Invoicing
